什么是LiveData?
LiveData是JetPack库中非常重要的一个部件. 它是一个自动感知数据变化的容器, 当它存储的数据发生变化时, 它会立刻感知到变化, 并且根据开发者实现注册的回调进行相应的动作.
LiveData的使用非常灵活, 我自己用到现在也只是掌握了一些最基本最常见的情境下如何去使用, 相信大家掌握后可以更好地使用LiveData这件灵活好用的工具.
LiveData的使用
为了说明LiveData的使用, 这里我们演示一个Demo. Demo的效果很简单:
在最开始时, Demo是这样的:

可以看到, 布局非常简单, 就是两个Button和一个TextView.
首先我们点击左侧的Button, 就会变成这样:
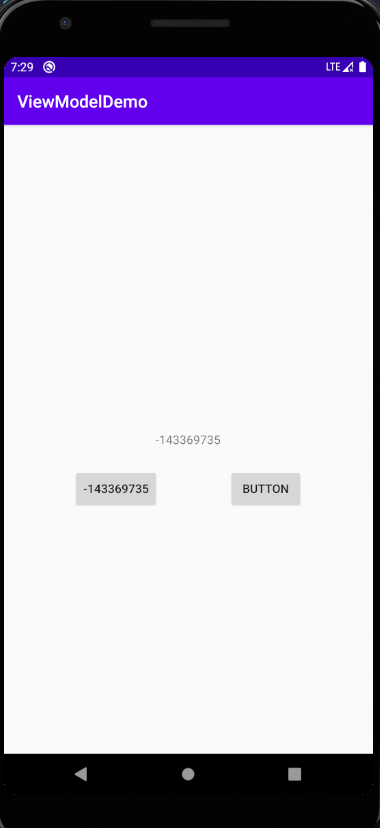
可以看到, 左面Button上的文字变成了一个随机数, 同时TextView的内容也变成了这个随机数.
然后我们再点击右侧的Button:
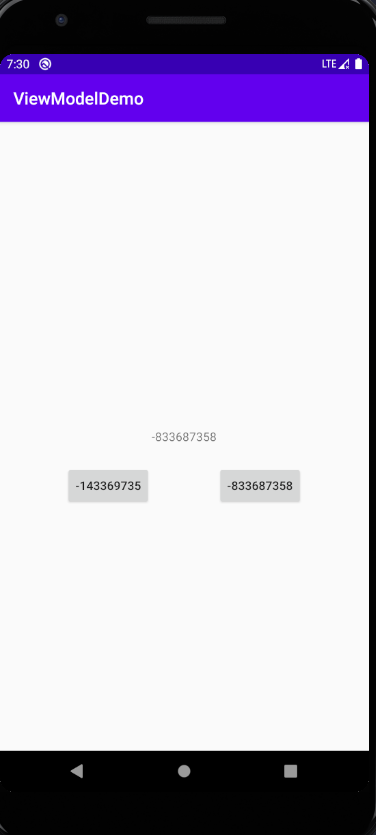
这是右侧Button上的文字也变成了一个随机数, 同时TextView的内容也变成了右侧Button上的随机数.
这就是Demo的内容, 下面我们来实现它.
MutableLiveData
首先, 我们尝试使用最简单的LiveData: MutableLiveData.
我们先用一个ViewModel来保存两个MutableLiveData:
Example1-11
2
3
4
5
6
7
8
9
10
11
12
13
14
15
16
17
18
19
20
21
22
23
24
| public class MyViewModel extends ViewModel {
private MutableLiveData<Integer> dataA = new MutableLiveData<>();
private MutableLiveData<Integer> dataB = new MutableLiveData<>();
public MyViewModel() {
}
void changeValue(int code){
if(code == 0){
dataA.setValue(new Random().nextInt());
}
else{
dataB.setValue(new Random().nextInt());
}
}
public MutableLiveData<Integer> getDataA() {
return dataA;
}
public MutableLiveData<Integer> getDataB() {
return dataB;
}
}
|
逻辑很简单, dataA负责存方左侧Button的随机数, dataB负责存放右侧Button的随机数. changeValue()方法通过一个参数来决定该变哪个数据的值.
然后我们在Activity中来使用MutableLiveData:
Example1-21
2
3
4
5
6
7
8
9
10
11
12
13
14
15
16
17
18
19
20
21
22
23
24
25
26
27
28
29
30
| public class MainActivity extends AppCompatActivity {
@Override
protected void onCreate(Bundle savedInstanceState) {
super.onCreate(savedInstanceState);
setContentView(R.layout.activity_main);
final MyViewModel myViewModel = new ViewModelProvider(this).get(MyViewModel.class);
final Button button1 = findViewById(R.id.button);
final Button button2 = findViewById(R.id.button2);
button1.setOnClickListener(v -> myViewModel.changeValue(0));
button2.setOnClickListener(v -> myViewModel.changeValue(1));
final TextView textView = findViewById(R.id.textView);
myViewModel.getDataA().observe(this, new Observer<Integer>() {
@Override
public void onChanged(Integer integer) {
button1.setText(String.valueOf(integer));
textView.setText(String.valueOf(integer));
}
});
myViewModel.getDataB().observe(this, integer -> {
button1.setText(String.valueOf(integer));
textView.setText(String.valueOf(integer));
});
}
}
|
前面的创建ViewModel和初始化控件我们都能看懂, 这里主要看最后两段: 我们通过ViewModel的接口获得了两个MutableLiveData, 然后为他们注册两个Observer, Observer是一个回调接口, 我们可以通过实现回调接口方法来让LiveData在得知数据更新后应该怎么反应. 为DataA注册的那段是为了让大家明白实际上我们注册的是一个Observer才这么写的, 但是用得最多的还是为DataB注册的那段: 用Lamda表达式来注册回调.
这样, 我们就完成了这个Demo, 大家可以复制代码跑一下, 看一下效果.
现在, 让我们来引入MediatorLiveData, 在不改变Demo效果的情况下对代码进行重构.
MediatorLiveData可以同时监听多个LiveData的数据变化. 从Demo的代码中我们看到, DataA和DataB其实主要负责两个Button的文字变化, TextView其实是同时监听两个Data的, 这种情况下, 其实使用MediatorLiveData更合理.
Example2-11
2
3
4
5
6
7
8
9
10
11
12
13
| final MediatorLiveData<Integer> mediatorLiveData = new MediatorLiveData<>();
mediatorLiveData.addSource(myViewModel.getDataA(), integer -> {
button1.setText(String.valueOf(integer));
mediatorLiveData.setValue(integer);
});
mediatorLiveData.addSource(myViewModel.getDataB(), integer -> {
button2.setText(String.valueOf(integer));
mediatorLiveData.setValue(integer);
});
mediatorLiveData.observe(this, integer -> {
textView.setText(String.valueOf(integer));
});
|
这次, 我们将Demo代码中监听两个Data的两段代码改为上面的代码. 在上面的代码中, 我们创建了一个存储Integer的MediatorLiveData, 并且通过addSource()方法让MediatorLiveData同时监听DataA和DataB. 这次我们不仅要为DataA和DataB注册回调函数, 还要为MediatorLiveData注册回调函数. 当DataA或者DataB发生变化时, 它们会让自己负责的Button的文字改变, 同时更新MediatorLiveData存储的数据. MediatorLiveData发现自己的数据改变后, 不去追究到底是哪个Data更新了自己, 只是去更新TextView的内容.
这样, 我们就在不改变Demo效果的同时, 引入了MediatorLiveData.
接下来我们来引入Transforms.map. Transforms是LiveData的一个工具类, 它负责实现不同LiveData间数据的转换. 首先我们先看一下map()这个方法. 它负责关联两个不同的LiveDta, 当一个LiveData的数据改变时, 被关联的LiveData会自动被更新数据. 这个数据是关联的LiveData的最新数据通过自定义的函数得到的. 口头说可能比较难理解, 我们还是看代码:
Example3-11
2
3
4
5
6
7
8
9
10
11
12
13
14
| LiveData<String> stringLiveDataA = Transformations.map(myViewModel.getDataA(), String::valueOf);
LiveData<String> stringLiveDataB = Transformations.map(myViewModel.getDataB(), String::valueOf);
final MediatorLiveData<String> mediatorLiveData = new MediatorLiveData<>();
mediatorLiveData.addSource(stringLiveDataA, str -> {
button1.setText(String.valueOf(str));
mediatorLiveData.setValue(str);
});
mediatorLiveData.addSource(stringLiveDataB, str -> {
button2.setText(String.valueOf(str));
mediatorLiveData.setValue(str);
});
mediatorLiveData.observe(this, texstView::setText);
|
我们继续在第二个部分的代码上修改. 首先我们将MediatorLiveData存储的数据类型由Integer改为String, 然后观测我们用map()方法定义的两个存储String类的LiveData. 从代码中可以看到, map()方法的第一个参数是关联的LiveData, 第二个参数是自定义的转换方法. 因为在这里我只是将Integer转为String, 所以直接引用了valueOf()这个方法. 如果大家想实现更复杂的操作, 可以在第二个参数上通过Lamda表达式或者匿名内部类来定义自己的函数.
switchMap()是Transforms类提供的另外一个转换方法. 它和map()的不同之处在于, map()方法的自定义函数必须返回被关联的LiveData所存储的类型, switchMap()方法的自定义函数必须返回的是一个LiveData. 或者这么说, map()方法的自定义函数更新的是被关联的LiveData所存储的值, switchMap()方法的自定义函数更新的是被关联的LiveData本身.
下面是我们从map改成switchMap的代码, 逻辑很直观, 就不再多说了.
Example4-11
2
3
4
5
6
7
8
9
10
11
12
13
14
15
16
17
18
19
20
21
22
23
| LiveData<String> stringLiveDataA = Transformations.switchMap(myViewModel.getDataA(), integer->{
MutableLiveData<String> tmp = new MutableLiveData<>();
tmp.setValue(String.valueOf(integer));
return tmp;
});
LiveData<String> stringLiveDataB = Transformations.switchMap(myViewModel.getDataB(), integer->{
MutableLiveData<String> tmp = new MutableLiveData<>();
tmp.setValue(String.valueOf(integer));
return tmp;
});
final MediatorLiveData<String> mediatorLiveData = new MediatorLiveData<>();
mediatorLiveData.addSource(stringLiveDataA, str -> {
button1.setText(String.valueOf(str));
mediatorLiveData.setValue(str);
});
mediatorLiveData.addSource(stringLiveDataB, str -> {
button2.setText(String.valueOf(str));
mediatorLiveData.setValue(str);
});
mediatorLiveData.observe(this, textView::setText);
|
LiveData的原理
存储管理
LiveData1
2
3
4
5
6
7
8
9
10
11
12
13
14
15
16
17
18
19
20
21
22
| public abstract class LiveData<T>{
private SafeIterableMap<Observer<? super T>, ObserverWrapper> mObservers =
new SafeIterableMap<>();
public void observe(@NonNull LifecycleOwner owner, @NonNull Observer<? super T> observer) {
assertMainThread("observe");
if (owner.getLifecycle().getCurrentState() == DESTROYED) {
return;
}
LifecycleBoundObserver wrapper = new LifecycleBoundObserver(owner, observer);
ObserverWrapper existing = mObservers.putIfAbsent(observer, wrapper);
if (existing != null && !existing.isAttachedTo(owner)) {
throw new IllegalArgumentException("Cannot add the same observer"
+ " with different lifecycles");
}
if (existing != null) {
return;
}
owner.getLifecycle().addObserver(wrapper);
}
}
|
上面是LiveData关于存储管理的部分. 我们看到, LiveData的observe方法传入的是一个LicycleOwner和一个Observer接口的实现. 如果这个LifecycleOwner的生命周期进入了销毁阶段, 那么LiveData是拒绝管理它的. 当LifecycleOwner正常存在时, LiveData会把LifecycleOwner和Observer接口作为一个Key-Value对放入Map中去, 同时为LifecycleOwner注册这个Observer.
这里还涉及到了一个LifecycleBoundObserver类. 这个类是LiveData的一个内部类, 它的实现代码如下:
LifecycleBoundObserver1
2
3
4
5
6
7
8
9
10
11
12
13
14
15
16
17
18
19
20
21
22
23
24
25
26
27
28
29
30
31
32
33
34
| class LifecycleBoundObserver extends ObserverWrapper implements LifecycleEventObserver {
@NonNull
final LifecycleOwner mOwner;
LifecycleBoundObserver(@NonNull LifecycleOwner owner, Observer<? super T> observer) {
super(observer);
mOwner = owner;
}
@Override
boolean shouldBeActive() {
return mOwner.getLifecycle().getCurrentState().isAtLeast(STARTED);
}
@Override
public void onStateChanged(@NonNull LifecycleOwner source,
@NonNull Lifecycle.Event event) {
if (mOwner.getLifecycle().getCurrentState() == DESTROYED) {
removeObserver(mObserver);
return;
}
activeStateChanged(shouldBeActive());
}
@Override
boolean isAttachedTo(LifecycleOwner owner) {
return mOwner == owner;
}
@Override
void detachObserver() {
mOwner.getLifecycle().removeObserver(this);
}
}
|
可以看到, 它其实是一个LifecycleObserver的子类. 显然, LiveData就是通过它来观察自己存储的每一个LifecycleOwner, 当LifecycleOwner处于合适的状态时, 就告知它数据发生了变化.
这里还要再提一下关于存储管理的两外两个方法:
1
2
3
4
5
6
7
| protected void onActive() {
}
protected void onInactive() {
}
|
这两个方法LiveData只给了空实现, 但是实际上它们是十分有用的一个方法. 当激活的Observer的数量从0变为1时, onActive()方法就会被执行; 当激活的Observer的数量从1变为0时, onInactive()方法就会被执行. 可以说, 这两个方法是对LiveData中Observer数量的一个简单监听.
数据更改
1
2
3
4
5
6
7
8
9
10
11
12
13
14
15
16
17
18
19
20
21
22
23
24
25
26
27
28
29
30
31
| private final Runnable mPostValueRunnable = new Runnable() {
@SuppressWarnings("unchecked")
@Override
public void run() {
Object newValue;
synchronized (mDataLock) {
newValue = mPendingData;
mPendingData = NOT_SET;
}
setValue((T) newValue);
}
};
protected void postValue(T value) {
boolean postTask;
synchronized (mDataLock) {
postTask = mPendingData == NOT_SET;
mPendingData = value;
}
if (!postTask) {
return;
}
ArchTaskExecutor.getInstance().postToMainThread(mPostValueRunnable);
}
protected void setValue(T value) {
assertMainThread("setValue");
mVersion++;
mData = value;
dispatchingValue(null);
}
|
上面是LiveData与更改数据相关的部分. 可以看到, LiveData有两个更新自己数据的方法: setValue和postValue. 前者在主线程更新数据, 后者则是一个异步更新数据的方法, 它用LiveData自定义的Runnable, 通过Handle的原理将数据传给主线程, 到主线程后再调用setValue方法.
消息通知
从setValue()方法中我们看到, 在更新数据后, 方法又调用了dispatchingValue()这个方法. 显然, 这个方法使用来告知所有的LifecycleOwner数据已经被更新的.
1
2
3
4
5
6
7
8
9
10
11
12
13
14
15
16
17
18
19
20
21
22
23
24
25
26
27
28
29
30
31
32
33
34
35
36
37
38
39
| private void considerNotify(ObserverWrapper observer) {
if (!observer.mActive) {
return;
}
if (!observer.shouldBeActive()) {
observer.activeStateChanged(false);
return;
}
if (observer.mLastVersion >= mVersion) {
return;
}
observer.mLastVersion = mVersion;
observer.mObserver.onChanged((T) mData);
}
void dispatchingValue(@Nullable ObserverWrapper initiator) {
if (mDispatchingValue) {
mDispatchInvalidated = true;
return;
}
mDispatchingValue = true;
do {
mDispatchInvalidated = false;
if (initiator != null) {
considerNotify(initiator);
initiator = null;
} else {
for (Iterator<Map.Entry<Observer<? super T>, ObserverWrapper>> iterator =
mObservers.iteratorWithAdditions(); iterator.hasNext(); ) {
considerNotify(iterator.next().getValue());
if (mDispatchInvalidated) {
break;
}
}
}
} while (mDispatchInvalidated);
mDispatchingValue = false;
}
|
上面是LiveData关于消息通知的部分. 我们看到, LiveData通过considerNotify()方法来传入最新的数据, 并且调用我们注册的回调函数. 当dispatchingValue()的参数为null时, LiveData会遍历自己存储的所有LifecycleOwner, 依次调用considerNotify()来执行回调; 当dispatchingValue()的参数不为null时, LiveData就只会对参数指定的LifecycleOwner调用considerNotify().
至此, 我们就熟悉了LiveData的基本工作流程.